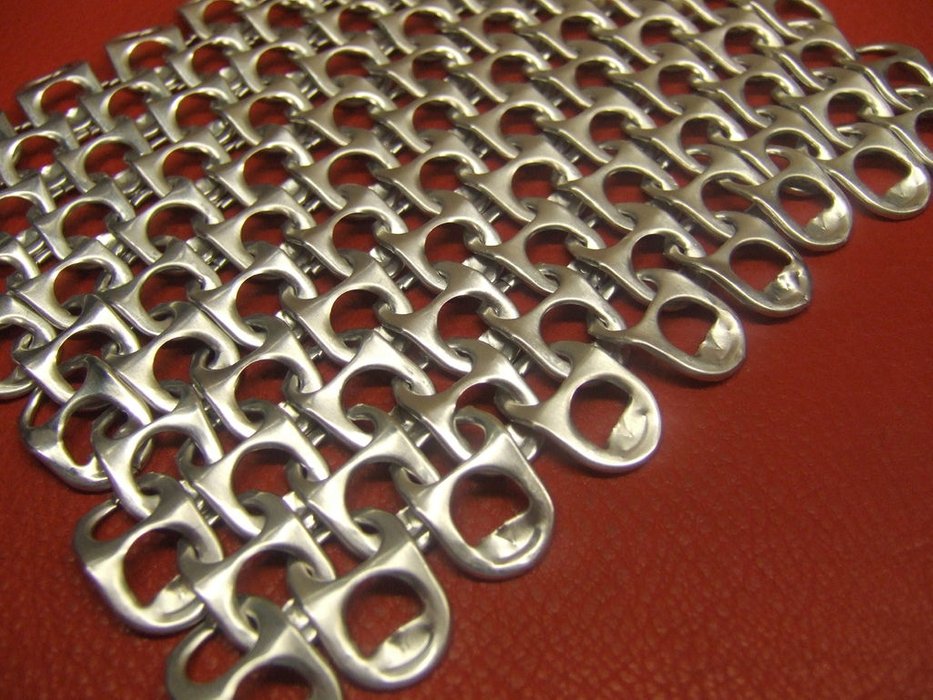
Turns out this is very easy and makes a really great looking piece of maille, and as an added bonus you don’t have to worry about having a quarter mile of wire on hand to attach them together.
Step 1: Assemble Your Supplies
OK, you are going to need lots and lots of pop tabs. Don’t give yourself renal failure trying to drink them all yourself. Spread it out or enlist the help of your family, friends, workmates, or maybe even the local recycling center. Here is what you will need:
Cutters
Staple remover
Old key
Non-mangled pop tabs (however many you need, 1000 is a good start)
Step 2: Prepare the Tabs
You will need to prepare the tabs for the weaving. Bend the collar down from the “top” side of the tab using the tumbler side of the key. Then use the back of the key to continue bending it down against the side of the tab. Lay the tab face down and push the cupped part down flat.
Step 3: Cut
Now that all your tabs are flat and consistent, you need to cut and crimp them.
Cut them in the very middle of the pull part of the tab, or for a stronger connection, on the rivet side, either way just be consistent.
Step 4: Bend
The tabs will need to be bent slightly so they will lay together properly. This is where the staple remover comes it. Turns out it gives it just the right amount of bend. Put the tab in cut side first and close the tool down so that one side holds the cuts and the “bridge” is over the metal edge on the other side. Press with your finger and, bam! you’re done.
Step 5: Repeat
Keep making the links, do them all at once, do them in batches. Either way, its pretty easy to make them.
One note: If you are using cutters, you can bend the tabs first, if you are using scissors you have to cut them first.
Step 6: Weave
Now that you have a massive pile of tabs ready, you will begin the weaving. The first picture shows 4 links woven together in the traditional European 4 in 1 style. The next photos show the proper way to connect them together.
Holding one tab by the back, with one hand, take another tab with your free hand.
Push the back of the second tab through the cut on the first tab from the bottom so that it is on one side.
After they are connected together do the same with a second tab, but on the opposite side.
The fourth tab you put on will connect the two “shoulder” tabs together.
Connect the fourth tab so that the second and third are laying one on each side.
The back of the tabs should always end up on the bottom side of the weave.
Step 7: Continue Weaving
Keep doing this until you have reached the desired size. I won’t go into detail in this Instructable regarding how to make a specific garment or item. But I will give you some tips on weaving. Because of the pattern, you have a couple different “fabric” geometries you can work with.
The first is the diamond geometry, each link is connected to 3 others
The second is the square, each link (except those on the edges) uses pattern’s full 4 to 1 connection
As your swatch gets larger it might be easier to flip it over to continue weaving, because you will need to handle the main body less as you attach new links.
Step 8: Final Thoughts
I hope you enjoyed this instructable, it is the first I’ve written. I still have alot more tabs to go before I will be able to finish anything. I will probably make a pixane, and create a new Instructable for it. I will leave you with some pictures of this cool looking chainmaille.


