by
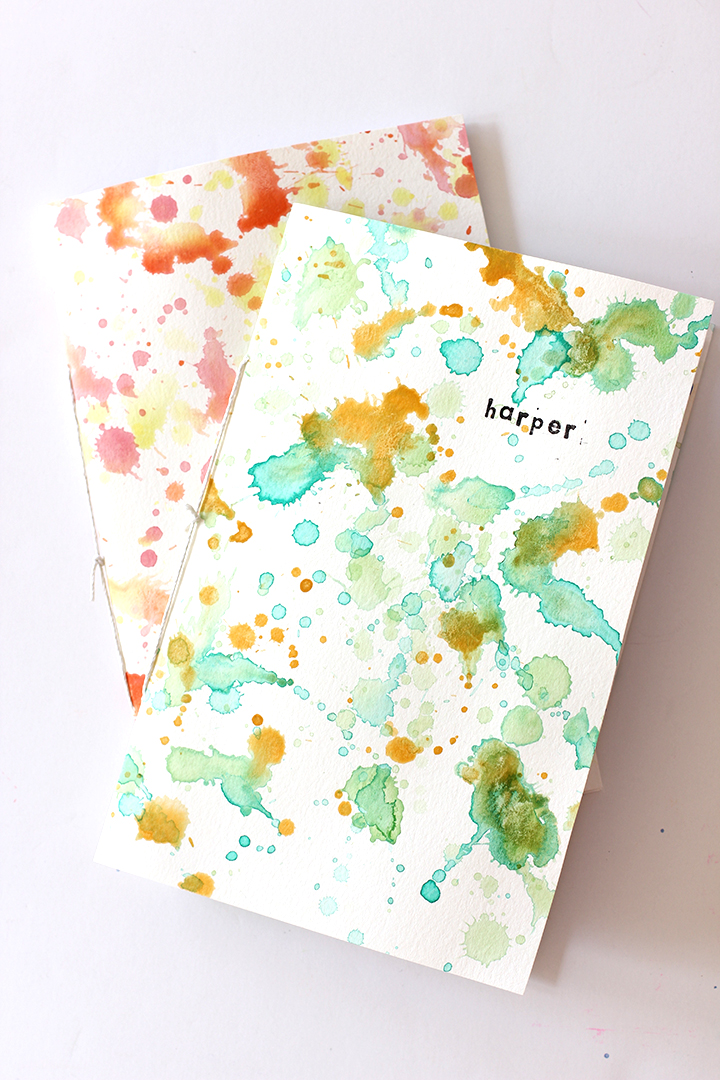
by Time to channel your inner Jackson Pollock for this DIY project. Have you ever tried splatter painting with water color paints? We created handmade notebooks using this method on a good thick watercolor paper for the cover. This project can be done with the kids as well… be prepared, it can get messy. These notebooks would make perfect gifts for kids and grown ups alike. Personalize with stamps – imagine the possibilities.
Read more for the full tutorial…

Supplies:
Water color paint set // Watercolor Paper // printer paper // paint brush // alphabet stamp set // ink paper // scissors // needle and string

Steps:
I used a very basic book making process. You can follow a more detailed book binding process here.
1. Select color theme for notebook. I use water color paints that I can mix myself. This type gives you the ability to get a richer color. Mix watercolors and splatter away! Protect the working surface. Let the paint dry for a few hours.
2. Fold inner pages in half evenly. I used 6 pages of printer paper.
3. Measure and cut the watercolor paper to a 1/4 inch larger than inner paper.
4. Fold the watercolored paper in half. Use a pencil or bone folder tool for a sharp fold.
5. Measure two spots (2 inches in from edge) for holes. Using a needle, make hole through the inner pages. Line up with cover and make the same holes.
6. Using needle and string, thread the string from the outside of the cover through the inside and the pages and back up to the cover. Tie a tight knot on the outside of the book. You can also do this the opposite way using thinner thread and tie it inside the book.
7. Stamp away! Personalize the book anyway you like. Harper put her name on the book and has turning it into a math notebook!
Enjoy! This would be a fun party favor for kids or a sweet Mother’s Day gift for Grandma as well. So many possibilities.