 by
by materials
- Cricut® Explore Air 2™ Special Edition Martha Stewart Machine Bundle
- Design Space® Martha Stewart Paper Butterfly Bouquet Project
- 12-by-12-inch cardstock in dark pink (2 sheets), light pink (2 sheets), yellow (2 sheets), orange (2 sheets), blue (2 sheets), and green (4 sheets)
- Cricut® 12-by-12-inch LightGrip Adhesive Cutting Mat
- Flower stem wire
- Floral wire
- Hot glue gun and sticks
steps
-
Design and cut bouquet: Follow the project link to Design Space®. If you want to alter the project, click “Customize,” then use the tools in the Edit panel to make changes. Click “Continue” or “Make It.”
-
Place the first piece of cardstock onto the StandardGrip mat. Follow these prompts to load the machine: Set SmartSet Dial to “Cardstock.” Load fine-point blade in Clamp B. Load mat and press the “Load / Unload” button.
-
Press the flashing “Go” button, and cut! Unload the mat. Peel away the negative material, then if needed, use the spatula from the basic tool set to lift the individual butterflies.
-
Continue Step 3 by loading the cutting mat with each new sheet of cardstock, then into the machine as prompted.
-
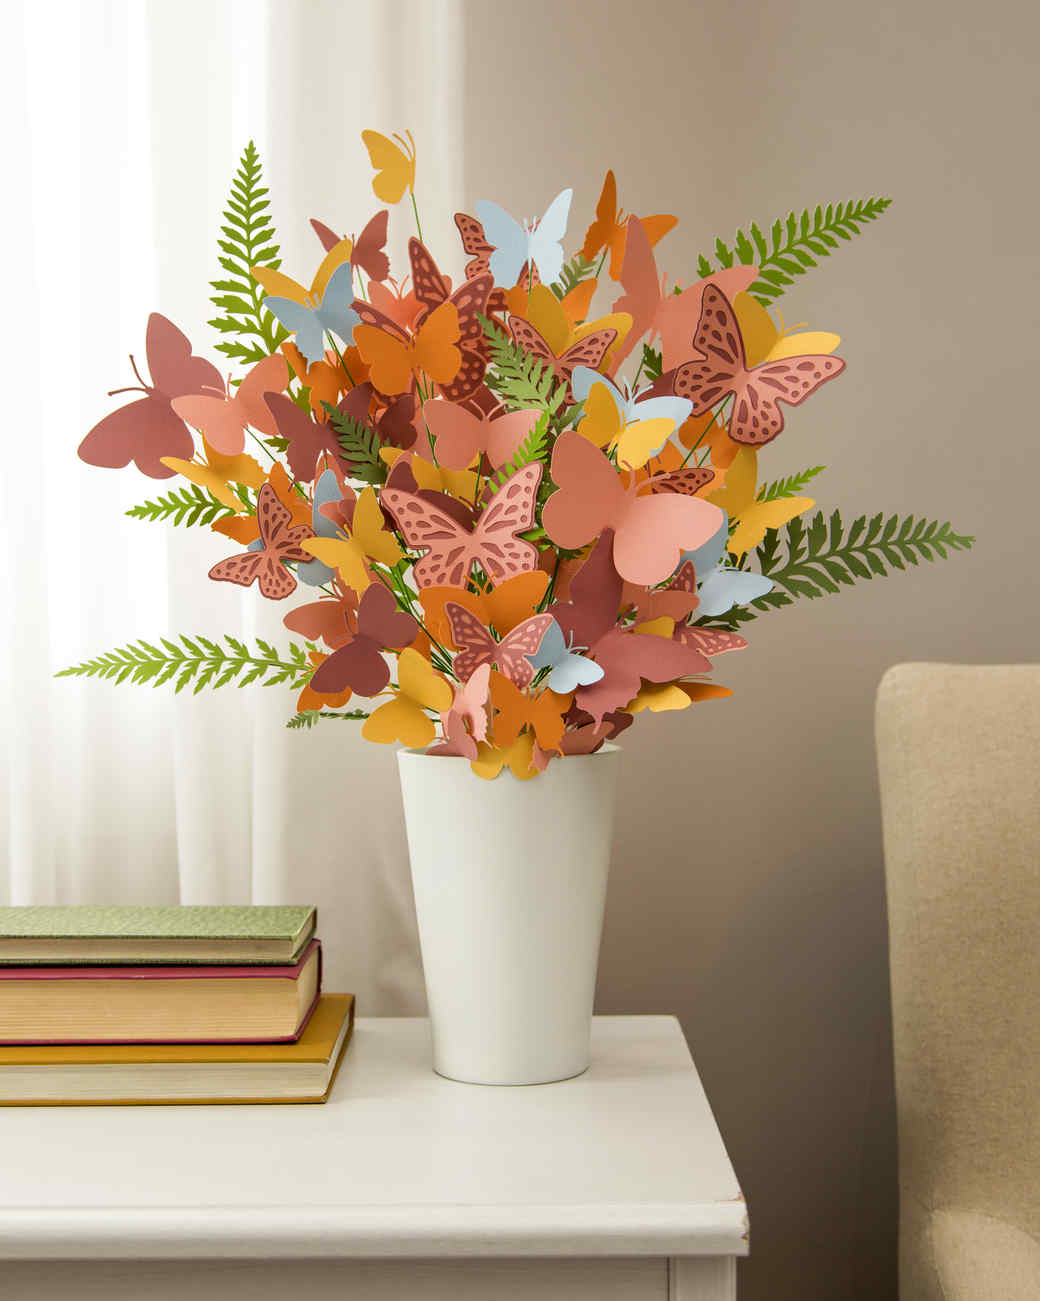
Assemble bouquet: Arrange the butterfly pieces by color and design.
-
Hot glue the matching pieces of the butterflies to each other so they are double-sided. Glue each butterfly to a piece of floral stem wire or floral wire.
-
Arrange the floral wires in the grip of your hand, then place in a vase. (Tip: Include floral foam in your vessel for a secure hold.)